Set up Android Jenkins CI on AWS EC2
Goal
- Set up Jenkins CI master on EC2 (t2.micro)
- Set up Jenkins CI agent on EC2 (t2.small)
- Trigger CI on master, task run on agent.
Set up Jenkins master
Launch an EC2 instance, t2.micro is enough.
Allocate Elastic IP (Optional)
If you don’t want your IP address of CI change after restart EC2 instance, you should allocate an Elastic IP to it.
Select your EC2 instance on console. Click Actions -> Networking -> Manage IP Address.
Then click Allocate an Elastic IP.
Click Allocate Button.
Bind your EC2 instance with Elastic IP. Make sure you do not have unused Elastic IP, otherwise it’ll cost additional charge.
An Elastic IP address doesn’t incur charges as long as the following conditions are true:
- The Elastic IP address is associated with an Amazon EC2 instance.
- The instance associated with the Elastic IP address is running.
- The instance has only one Elastic IP address attached to it.
If you’ve stopped or terminated an EC2 instance with an associated Elastic IP address and you don’t need that Elastic IP address any more, consider disassociating or releasing the Elastic IP address.
After an Elastic IP address is released, you can’t provision that same Elastic IP address again, though you can provision a different Elastic IP address.
Install docker
Connect to your EC2 instance with ssh, execute command:
If your EC2 is Amazon Linux AMI
sudo yum update -y
sudo yum install -y docker
sudo service docker start
sudo usermod -a -G docker $USER

exit
If your EC2 is Ubuntu
sudo apt-get update
sudo apt-get install docker.io
sudo usermod -a -G docker $USER

exit
Run jenkins
Connect to your EC2 instance again (After set docker sudo authority, you should exit and re-login, then it can take effect), execute command:
docker run -d -p 8080:8080 -p 8090:8090 jenkinsYou can notice 8080 and 8090 port are exposed. (8080 for Jenkins server, 8090 for JNLP)
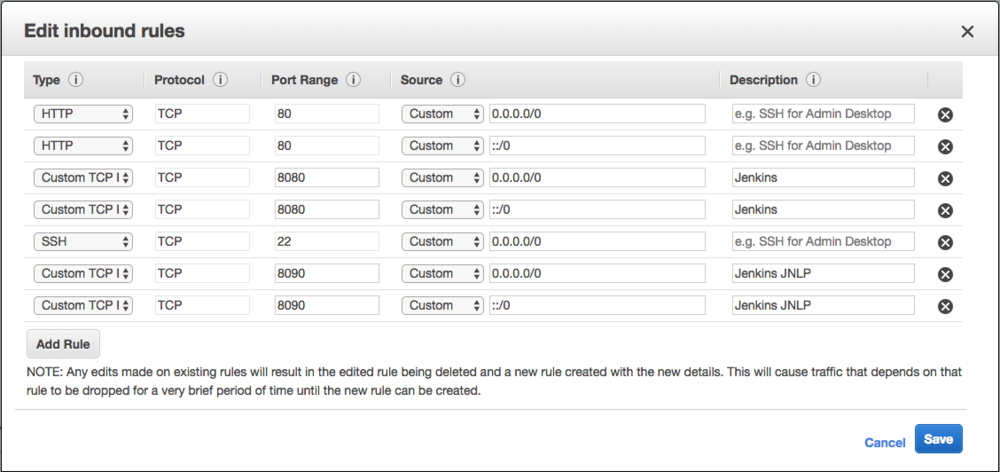
Then you should go back to your EC2 console, click the item belongs to you EC2 instance in Security Groups column.
Click Inbound -> Edit -> Add Rule.
Select Custom TCP Rule, input 8080 in Port range field. give a description such as: Jenkins.
Add Rule again, Then select Custom TCP Rule, input 8090 in Port range field. give a description such as: JNLP.
Security Groups is like firewall of EC2 instance, unless you add rules for specific ports, you cannot access them from internet.
Configure jenkins
Type (Public IP of EC2):8080 in your browser. you can access Jenkins now.
First you should input administrator password.
You can get it using docker exec (container id) cat ... on EC2.
After basic configuration, click Manage Jenkins -> Configure Global Security.
Set TCP port for JNLP agents to Fixed: 8090, then Save.
Click Manage Jenkins -> Manage Nodes, add a new agent.
- Name: android-agent-1
- #of executors: 1
- Remote root directory: /opt/jenkins
- Label: android
- Usage: Only build jobs with label expressions matching the node
- Launch method: Launch agent via Java Web Start
- Availability: Keep this agent online as much as possible
Create Pipeline
Create a pipeline:
- Select Pipeline script from SCM
- SCM Git
- Repository URL git@github.com:username/Project
- Script Path Jenkinsfile
Add credentials -> SSH Username with private key.
Set your Username with your github username.
Select Enter directly for Private Key.
Input your private key (Get it from cat ~/.ssh/id_rsa) in Key field.
The Jenkinsfile in your project can be like this:
pipeline {
    agent {
        label "android"
    }
    stages {
        stage('Test') {
             steps {
                sh "./gradlew clean lintDevDebug checkDevDebug testDevDebug"
             }
        }
    }
}
Set up Jenkins agent
Launch an EC2 instance, should be at least t2.small.
t2.micro cannot stand Android build task. (Gradle build daemon disappeared unexpectedly (it may have been killed or may have crashed) )
Connect the agent instance, install docker.
Go back to your CI master page, click android-agent-1 (which is still offline) in Build Executor Status.
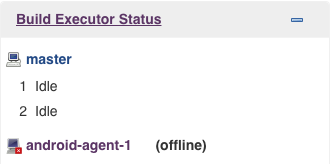
You can see:
java -jar slave.jar -jnlpUrl http://(ip):8080/computer/android-agent-1/slave-agent.jnlp -secret a4234d6bca1e04c9421x8b27484a3d780c7g7af0aecsdb8fd2c96c89ac53ae42
Copy the ip and secret.
Execute command on angent ec2 instance:
docker run -d --rm --name android-agent-1 jmengxy/android-sdk:jenkins-3.15-3859397-26-26.0.2 http://(ip):8080/ a4234d6bca1e04c9421x8b27484a3d780c7g7af0aecsdb8fd2c96c89ac53ae42 android-agent-1Wait several seconds you would see:
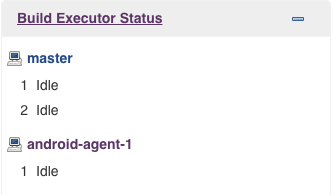
android-agent-1 in no longer offline.
Trigger a build on CI, it’ll work as you expected.
References
Install docker on AWS EC2 AMI instance
What are Elastic IP addresses, and how do I use them?
Solving Docker permission denied while trying to connect to the Docker daemon socket